

Civilizations have flourished throughout history, each adding their own special knowledge and wisdom to the extensive fabric of human history. In addition to their numerous accomplishments, ancient cultures had a strong awareness of natural cures and were adept at using plants, animals, and other elements of nature to heal people. Unfortunately, as the world has changed, some of these powerful cures that were previously valued for their medicinal advantages have vanished with the passage of time and have been eclipsed by contemporary medical breakthroughs. As we delve into the past, we shall uncover the forgotten secrets of healing and witness the revival of ancient wisdom that may hold useful insights for the health and well-being of our present and future generations. But in our quest to rediscover the wisdom of our ancestors, we set out on a journey to reveal the enigmatic "Top 10 Most Potent Remedies Lost to History but Rarely Used." Here are the examples and how to use it and prepare it.
1. Myrrh Mouthwash

It is thought that the antibacterial and anti-inflammatory qualities of myrrh mouthwash can aid in maintaining dental hygiene and alleviate oral discomfort. Even if there may be some advantages to using myrrh regularly, it is always advisable to speak with a dentist or other healthcare provider first. An easy recipe for myrrh mouthwash is provided below:
Ingredients:
- 1 cup of distilled water
- 1 tablespoon of dried myrrh resin (available at health food stores or online)
- 1 teaspoon of anise seeds (optional, for flavor)
- 1 teaspoon of whole cloves (optional, for flavor)
- 1 teaspoon of powdered cinnamon (optional, for flavor)
- A small saucepan
- A glass jar or bottle with a tight-fitting lid
Instructions:
- In the saucepan, bring the distilled water to a boil. Once boiling, reduce the heat to low.
- Add the dried myrrh resin to the simmering water. Let it simmer gently for about 30 minutes. This process will extract the beneficial compounds from the myrrh.
- If you're using optional flavoring ingredients like anise seeds, whole cloves, or powdered cinnamon, add them to the simmering water as well. These can add a pleasant taste to the mouthwash.
- After 30 minutes, remove the saucepan from the heat and let the mixture cool down completely.
- Once the myrrh mixture has cooled down, strain it through a fine mesh strainer or cheesecloth into the glass jar or bottle. This will remove any solids or debris.
- Your myrrh mouthwash is ready to use! Store it in the refrigerator to prolong its shelf life. Shake the bottle before each use to ensure even distribution of the myrrh extract.
Use a tiny amount of the myrrh mouthwash (approximately 1-2 tablespoons) and swish it around in your mouth for 30 to 1 minute before spitting it out. Avoid ingesting the mouthwash.
2. Mastic Oil

Traditional uses for mastic oil, a resinous substance derived from the mastic tree (Pistacia lentiscus), include potential advantages for the digestive system. Here is a straightforward preparation for mastic oil that can be used to treat digestive issues:
Ingredients:
- 1 tablespoon of mastic resin (available at specialty stores or online)
- 1 cup of a carrier oil (such as olive oil or almond oil)
Instructions:
- Crush the mastic resin into smaller pieces using a mortar and pestle. This will make it easier to infuse the resin into the carrier oil.
- In a clean, dry glass jar or bottle with a tight-fitting lid, combine the crushed mastic resin and the carrier oil.
- Seal the jar or bottle tightly and give it a good shake to mix the ingredients.
- Place the sealed container in a warm, sunny spot, such as a windowsill, for about 1 to 2 weeks. This will allow the mastic resin to infuse into the carrier oil.
- Shake the jar or bottle gently every day to help with the infusion process.
- After 1 to 2 weeks, strain the mastic-infused oil through a fine mesh strainer or cheesecloth to remove any solid particles.
- Transfer the strained mastic oil into a clean glass bottle or container with a tight-fitting lid.
You can now use your mastic oil. It can be used orally to perhaps help with digestive issues.
3. White Willow Bark Tea

Due to the natural chemical salicin, which is similar to the active component in aspirin, white willow bark tea has long been utilized for its many health advantages. Here's a simple recipe for making white willow bark tea:
Ingredients:
- 1 tablespoon dried white willow bark (or 2 tablespoons if using fresh bark)
- 1 cup of water
Instructions:
- In a small saucepan, bring the water to a boil.
- Add the white willow bark to the boiling water.
- Reduce the heat to low, cover the saucepan, and let the mixture simmer for about 15 minutes.
- Remove the saucepan from the heat and strain the tea to remove the bark.
- You can sweeten the tea with honey or add a splash of lemon juice for flavor if desired.
- Drink the white willow bark tea while it's warm. You can have this tea 2-3 times a day for pain relief.
4. Juniper Berry Skin Tonic

Juniper berries are known for their cleansing and toning properties, making them suitable for various skin-related issues. Here's a simple recipe for a Juniper Berry Skin Tonic:
Ingredients:
- 1 cup distilled water
- 1 tablespoon dried juniper berries
- 1 tablespoon witch hazel extract
- 5-10 drops of tea tree essential oil (optional, for added antibacterial properties)
Instructions:
- In a small saucepan, bring the distilled water to a boil.
- Add the dried juniper berries to the boiling water.
- Reduce the heat to low, cover the saucepan, and let the mixture simmer for about 10-15 minutes.
- After simmering, remove the saucepan from the heat and let the mixture cool down completely.
- Strain the liquid to remove the juniper berries, using a fine mesh strainer or cheesecloth.
- Add witch hazel extract to the juniper berry-infused water and mix well.
- If you wish, add 5-10 drops of tea tree essential oil for its additional antibacterial properties. Stir to combine.
- Pour the mixture into a clean and sterilized bottle or container with a tight-fitting lid.
- Your Juniper Berry Skin Tonic is now ready to use.
How to use:
- Wash your face with a gentle cleanser and pat it dry.
- Take a small amount of the Juniper Berry Skin Tonic on a cotton pad or ball.
- Gently apply the tonic to your face, avoiding the eye area.
- Allow it to air dry on your skin.
- Follow up with your regular moisturizer, if desired.
Note: Before using the Juniper Berry Skin Tonic on your face, perform a patch test on a small area of your skin to check for any allergic reactions or sensitivities. If irritation occurs, discontinue use. Also, if you are pregnant or have any skin conditions, consult a dermatologist or healthcare professional before trying this tonic.
5. Comfrey Poultices for Wound Healing

Comfrey poultices have been used for centuries to promote wound healing and reduce inflammation. Here's a simple recipe for making a comfrey poultice:
- 2-3 fresh comfrey leaves (or 1-2 tablespoons of dried comfrey leaves)
- Boiling water
- Clean cloth or gauze
Instructions:
- If using fresh comfrey leaves, wash them thoroughly to remove any dirt or debris. If using dried comfrey leaves, skip to the next step.
- Finely chop the comfrey leaves to release their healing properties.
- Place the chopped comfrey leaves in a heatproof bowl.
- Pour enough boiling water over the comfrey leaves to make a paste-like consistency. Allow the mixture to cool slightly, so it's warm but not scalding.
- Soak the clean cloth or gauze in the warm comfrey mixture, ensuring it's fully saturated.
- Gently wring out the excess liquid from the cloth, so it's damp but not dripping.
- Apply the warm comfrey poultice directly to the affected area of the wound.
- Leave the poultice on for about 15-30 minutes.
- After the allotted time, remove the poultice and discard it.
- Repeat the process 2-3 times a day as needed for wound healing.
Note: If you have any allergies or skin sensitivities, perform a patch test before applying the comfrey poultice to a larger area. Additionally, avoid using comfrey on deep wounds or open sores. It's always a good idea to consult with a healthcare professional, especially for severe wounds or if you are pregnant or nursing.
Note: Due to safety concerns related to internal use, comfrey poultices should only be used externally and for a limited duration under the guidance of a qualified healthcare provider.
6. Elderberry Syrup for Immune Support

Elderberry syrup is a popular natural remedy believed to support the immune system and help alleviate symptoms of cold and flu. Here's a simple recipe for making Elderberry Syrup for immune support:
Ingredients:
- 1 cup dried elderberries or 2 cups fresh elderberries
- 3 cups water
- 1 cup honey (or maple syrup for a vegan option)
- 1-2 cinnamon sticks
- 1-2 slices of fresh ginger (optional)
- 2-3 whole cloves (optional)
Instructions:
- In a saucepan, combine the elderberries, water, cinnamon sticks, ginger (if using), and cloves (if using).
- Bring the mixture to a boil, and then reduce the heat to low.
- Let the mixture simmer for about 30-45 minutes, or until the liquid has reduced by half.
- Remove the saucepan from the heat and let the mixture cool slightly.
- Mash the elderberries using a spoon or potato masher to release their juices.
- Strain the liquid through a fine mesh strainer or cheesecloth into a bowl, pressing down on the elderberries to extract all the juice.
- Let the liquid cool to room temperature.
- Stir in the honey (or maple syrup) into the elderberry liquid until well combined.
- Transfer the elderberry syrup into a clean and sterilized glass jar or bottle with a tight-fitting lid.
- Store the elderberry syrup in the refrigerator. It can last for several weeks.
- For immune support: Take 1 tablespoon of elderberry syrup daily for adults or 1 teaspoon for children. You can increase the frequency to 3-4 times a day if you feel the onset of cold or flu symptoms.
7. Angelica Root Respiratory Aid

Angelica root is believed to have respiratory benefits, including helping to relieve congestion and support the respiratory system. Here's a simple recipe for an Angelica Root Respiratory Aid:
Ingredients:
- 1 tablespoon dried angelica root
- 1 cup water
- 1-2 teaspoons honey (optional, for taste)
Instructions:
- In a small saucepan, bring the water to a boil.
- Add the dried angelica root to the boiling water.
- Reduce the heat to low, cover the saucepan, and let the mixture simmer for about 15-20 minutes.
- After simmering, remove the saucepan from the heat.
- Let the mixture cool down slightly.
- Strain the liquid to remove the angelica root, using a fine mesh strainer or cheesecloth.
- If desired, add 1-2 teaspoons of honey to the liquid for taste and added soothing benefits.
- Stir the honey until it dissolves completely.
- Pour the Angelica Root Respiratory Aid into a cup and drink it while it's warm.
How to use:
- You can drink this Angelica Root Respiratory Aid 1-2 times a day, as needed, to support respiratory health and relieve congestion.
Note: Angelica root may interact with certain medications or have contraindications for specific health conditions. If you are pregnant, nursing, taking medications, or have any health concerns, it's essential to consult with a healthcare professional before using angelica root or any herbal remedies.
8. Burdock Root Blood Purifier
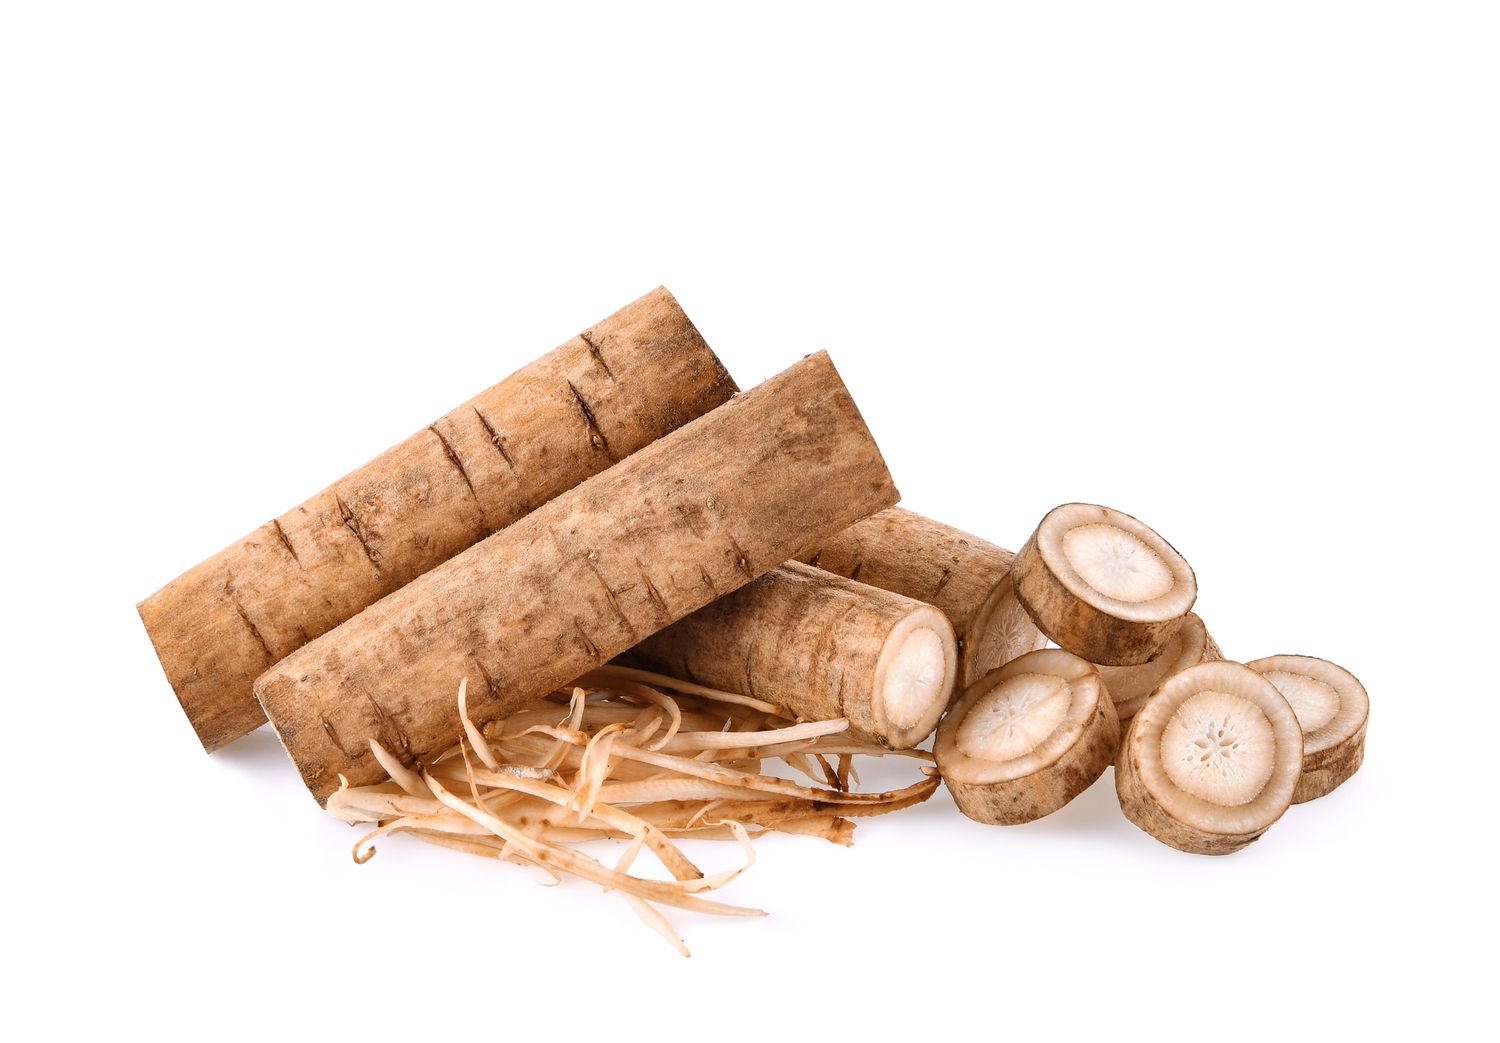
Burdock root is believed to have blood purifying properties and is often used in traditional herbal medicine for detoxification and skin health. Here's a simple recipe for making a Burdock Root Blood Purifier:
Ingredients:
- 1 tablespoon dried burdock root
- 1 cup water
- 1-2 teaspoons honey (optional, for taste)
Instructions:
- In a small saucepan, bring the water to a boil.
- Add the dried burdock root to the boiling water.
- Reduce the heat to low, cover the saucepan, and let the mixture simmer for about 15-20 minutes.
- After simmering, remove the saucepan from the heat.
- Let the mixture cool down slightly.
- Strain the liquid to remove the burdock root, using a fine mesh strainer or cheesecloth.
- If desired, add 1-2 teaspoons of honey to the liquid for taste and added benefits.
- Stir the honey until it dissolves completely.
- Pour the Burdock Root Blood Purifier into a cup and drink it while it's warm.
How to use:
- You can drink this Burdock Root Blood Purifier 1-2 times a day, as needed, to support detoxification and potential blood purification.
Note: Burdock root may interact with certain medications or have contraindications for specific health conditions. If you are pregnant, nursing, taking medications, or have any health concerns, it's essential to consult with a healthcare professional before using burdock root or any herbal remedies.
9. Coltsfoot Cough Lozenges

Coltsfoot is an herb traditionally used to soothe coughs and respiratory discomfort. Here's a simple recipe for making Coltsfoot Cough Lozenges:
Ingredients:
- 1/4 cup dried Coltsfoot leaves
- 1/4 cup honey (or maple syrup for a vegan option)
- 1/2 cup powdered sugar (or more if needed)
Instructions:
- In a blender or food processor, grind the dried Coltsfoot leaves into a fine powder.
- In a mixing bowl, combine the Coltsfoot powder and honey (or maple syrup).
- Mix the ingredients thoroughly until you have a thick, sticky mixture.
- Gradually add powdered sugar to the mixture and continue mixing until it forms a dough-like consistency.
- The mixture should be firm enough to handle without sticking to your hands. If it's too sticky, add more powdered sugar as needed.
- Roll the mixture into small balls and then flatten them slightly to form lozenges.
- Place the Coltsfoot Cough Lozenges on a parchment paper-lined tray or plate.
- Let the lozenges dry at room temperature for 24-48 hours, or until they harden and become firm.
- Once dried, store the lozenges in an airtight container.
How to use:
- Take one lozenge as needed to soothe cough and respiratory discomfort.
Note: Coltsfoot should not be used during pregnancy or breastfeeding. If you have any health conditions or are taking medications, it's essential to consult with a healthcare professional before using Coltsfoot Cough Lozenges or any herbal remedies. Additionally, individuals with allergies to plants in the Asteraceae family (such as ragweed or daisies) may also be allergic to Coltsfoot, and they should avoid using this remedy.
10. Horehound Elixir for Digestion

Horehound is an herb traditionally used to aid digestion and soothe digestive discomfort. Here's a simple recipe for making a Horehound Elixir for digestion:
Ingredients:
- 1/4 cup dried horehound leaves
- 1 cup water
- 1 tablespoon honey (or maple syrup for a vegan option)
- 1-2 slices of fresh ginger (optional, for added digestive benefits)
Instructions:
- In a small saucepan, bring the water to a boil.
- Add the dried horehound leaves and fresh ginger (if using) to the boiling water.
- Reduce the heat to low, cover the saucepan, and let the mixture simmer for about 15-20 minutes.
- After simmering, remove the saucepan from the heat.
- Let the mixture cool down slightly.
- Strain the liquid to remove the horehound leaves and ginger, using a fine mesh strainer or cheesecloth.
- Stir in the honey (or maple syrup) until it dissolves completely.
- Pour the Horehound Elixir into a clean and sterilized glass jar or bottle with a tight-fitting lid.
- Store the elixir in the refrigerator.
- Take 1-2 tablespoons of Horehound Elixir after a meal to aid digestion.
Note: Horehound may interact with certain medications or have contraindications for specific health conditions. If you are pregnant, nursing, taking medications, or have any health concerns, it's essential to consult with a healthcare professional before using horehound or any herbal remedies. Additionally, always follow the recommended dosage and avoid excessive consumption.
These treatments, which were previously prized for their effectiveness but have now fallen into obscurity, may nonetheless provide important lessons for the development of natural medicine.
Are the enigmas and profound wisdom of ancient civilizations enticing to you? Have you ever thought about the potent cures that our ancestors previously cherished? If so, kindly accept our invitation to embark on an exciting adventure of discovery and education. CLICK THE BUTTON BELOW

.jpg)
.jpg)


0 Comments